
How to Install a Seatpost: A Step-by-Step Guide
Upload time :August 28, 2023
Shares
Reads
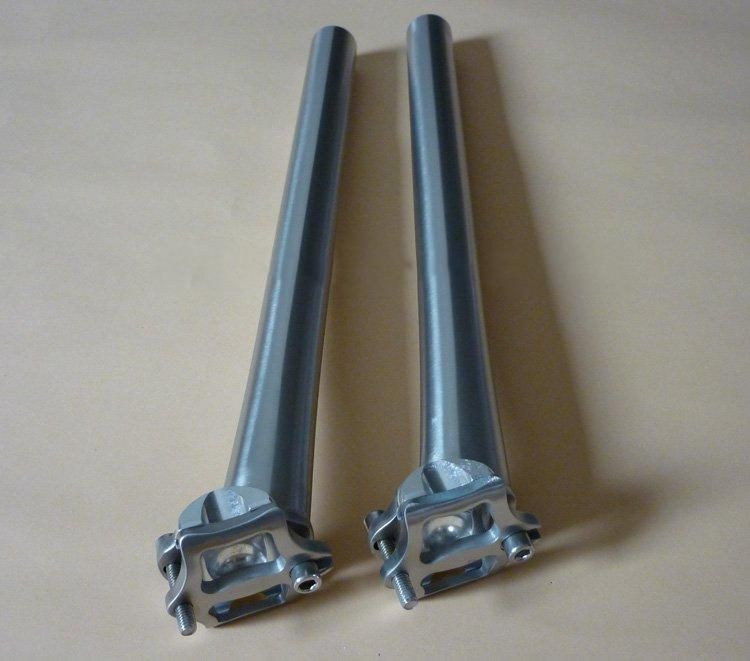
Seatpost replacement can be a daunting task, but with the right instructions, you can easily replace your old seatpost and upgrade to a new one. Start by removing the old seatpost and checking if the diameter of the new seatpost matches the bike frame. Make sure to clean the inside of the seat tube and apply lubricant if necessary before installing the new seatpost. Once inserted, adjust the height and angle according to your preference, then tighten the seatpost clamp bolt to secure the seatpost in place. Finally, test the seatpost by sitting on the bike, adjusting it as necessary to ensure it's at the correct height and angle for your riding style and comfort level. With these simple steps, you'll have a comfortable and efficient ride with your new seatpost.
 Buy NowSee More: Wholesale Products
Preparing the Bike
The first step is to remove the old seatpost if applicable. You can do this by loosening the bolt at the bottom of the seat post with a wrench. Once it's loose enough, wiggle the seatpost until it comes out. If it's stuck, apply some lubricant to the inside of the seat tube and let it sit for a few minutes before trying again. Make sure to clean the seat tube thoroughly once the old seatpost is removed.
Next, check if the diameter of the new seatpost matches the bike frame. Seatposts come in different diameters, so it's important to choose the right one that fits snugly into the seat tube. You can measure the diameter of the old seatpost with a caliper or take the frame to a bike shop to get accurate measurements. A mismatched seatpost can cause instability and discomfort while cycling, making it crucial to ensure that the diameter is correct.
After verifying that the seatpost diameter is compatible with the bike frame, it's time to clean the inside of the seat tube. Dirt and debris can accumulate inside the seat tube, causing friction between the seatpost and the tube. This can lead to damage or misalignment of the seatpost, making it essential to clean the seat tube before installing the new seatpost. Use a rag or a brush to clean the inside of the seat tube, removing any dirt or debris that may have accumulated.
Finally, apply lubricant to the inside of the seat tube if necessary. Lubrication reduces friction between the seatpost and the tube, providing a smooth and stable ride. Apply a small amount of grease or lubricant to the inside of the tube and spread it evenly using a clean rag or brush. Ensure that there's no excess lubricant left behind, as this can attract dirt and dust, leading to further problems down the line.
Installing the New Seatpost
The first step is to choose the right size of the seatpost that fits your bike’s seat tube. Most seat tubes have a diameter of 27.2mm, 30.9mm, or 31.6mm. You can measure the diameter using a caliper or consult your bike’s manual. Once you’ve selected the appropriate size, make sure that the length of the seatpost is compatible with your saddle's rails.
Next, remove the old seatpost from the seat tube by loosening the seatpost clamp bolt. Depending on the type of clamp, you may need an Allen key or a quick-release lever. Pull out the old seatpost gently, and inspect the seat tube for any damage or debris that may hinder the new seatpost’s insertion.
Now, insert the new seatpost into the seat tube, making sure it’s aligned with the centerline of the bike. Apply a thin layer of grease or carbon paste on the seatpost to prevent corrosion and slippage. Slowly push the seatpost down until it reaches the desired height. The general rule of thumb is to set the saddle height so that your leg is almost fully extended when the pedal is at the bottom position.
Once you’ve adjusted the height, you can set the angle of the saddle according to your preference. Some riders prefer a level saddle, while others prefer a slight tilt forward or backward. Use a spirit level or eye estimation to check the angle, and adjust it by tightening or loosening the saddle clamp bolt. However, be careful not to over-tighten the bolt, as it may damage the seatpost or saddle rails.
Finally, tighten the seatpost clamp bolt to secure the seatpost in place. The recommended torque varies depending on the material and design of the clamp, but generally, it’s between 5-7 Nm for aluminum and 8-12 Nm for carbon fiber. Use a torque wrench or a calibrated hex key to ensure that you apply the correct amount of force. Check the saddle and seatpost for any wobbling or movement, and make adjustments as necessary.
Checking and Adjusting
Firstly, it's important to note that there are several types of seatposts available, each with its unique features and benefits. Some of the most common types include suspension seatposts, carbon fiber seatposts, and aluminum seatposts. The type of seatpost you choose will depend on factors such as your budget, riding style, and personal preference.
Once you have your seatpost fixed in place, it's time to check if it's set up correctly. Begin by sitting on your bike and adjusting the seatpost height until your feet can touch the ground with ease. A general rule of thumb is to ensure that your knee is slightly bent when pedaling, which helps to reduce the risk of injury and discomfort. You may need to experiment with different heights to find the right one for you.
Next, consider the angle of the seatpost. Depending on your riding style and the type of bike you have, you may want to adjust the angle of the seatpost slightly. For instance, if you're into mountain biking or off-road cycling, you may prefer a more upright position. Alternatively, if you're a road cyclist, you may need a more aggressive angle to achieve maximum speed and performance.
It's also worth mentioning that some seatposts come with additional features such as shock absorption or adjustable damping. These can be useful if you're looking for a smoother ride, particularly if you're riding over rough terrain.
Finally, it's essential to regularly check your seatpost for wear and tear. Over time, dirt, dust, and grime can accumulate around the seatpost, leading to corrosion and rust. It's important to clean your seatpost regularly with a soft cloth and a mild cleaning solution to prevent any damage.
In conclusion, taking the time to check and adjust your seatpost can make all the difference in terms of your comfort and riding experience. Whether you're a casual rider or a professional cyclist, investing in the right seatpost and ensuring it's set up correctly is essential. With the tips outlined in this article, we hope you feel more confident in checking and adjusting your seatpost. Happy riding!
FAQ
Q: What tools do I need to install a seatpost?
A: To install a seatpost, you will need a few basic tools such as a hex wrench or Allen key, a torque wrench, a rag and some grease. The size of the hex wrench or Allen key that you need will depend on your bike and the type of seat clamp you have.
Q: How do I know which seatpost size to choose for my bike?
A: The easiest way to determine your seatpost size is to look at the bottom of your old seatpost or measure the inside diameter of your seat tube. Most common sizes for road bikes are 27.2mm, 30.9mm and 31.6mm, while mountain bikes typically use larger diameters like 31.8mm and 34.9mm.
Q: Can I adjust the angle of my seatpost after installation?
A: Yes, you can adjust the angle of your seatpost by loosening the seat clamp bolt and moving the saddle forward or backward as needed. However, be sure to tighten the bolt to the recommended torque setting to prevent the saddle from slipping during your ride.
Q: How tight should I torque my seatpost clamp bolt?
A: The recommended torque setting for your seatpost clamp bolt will vary depending on your bike's manufacturer and the type of material your seatpost and frame are made of. It's important not to over-tighten your clamp bolt as this can damage your seatpost or even your frame. Generally, a torque setting between 5-8 Nm is adequate for most seatposts and frames.
