
How to Clean Brush Hairs: The Ultimate Guide for a Flawless Makeup Application
Upload time :September 26, 2023
Shares
Reads
In order to achieve a flawless makeup application, it is vital to understand the importance of clean brush hairs. This ultimate guide provides you with the proper cleaning technique, tips for drying and storing your brushes, the benefits of regular cleaning, and the tools necessary for effective cleaning. Not only does regularly cleaning your brushes improve the application of your makeup, but it also prevents bacteria buildup on the bristles that can lead to breakouts and infections. To properly clean your brushes, use a gentle cleanser and warm water, being careful not to get water inside the ferrule. After rinsing thoroughly, reshape the bristles and lay the brushes flat to dry. Invest in a good quality brush cleaner and consider using a brush mat or glove for deeper cleaning. By following these steps, you'll ensure that your makeup application is flawless every time.
1. Importance of clean brush hairs
Importance of Clean Brush Hairs
Dirty brush hairs are a breeding ground for bacteria, oil, and dead skin cells. When you use these brushes on your face, you transfer these bacteria and dirt onto your skin, resulting in clogged pores, breakouts, and acne. Moreover, makeup application becomes difficult with dirty brushes as the bristles become clumped together and stiff, affecting their ability to blend and apply product smoothly.
Clean brush hairs are essential for maintaining good hygiene and avoiding skin problems. It is recommended to clean your brushes at least once a week, depending on how often you use them. If you have sensitive or acne-prone skin, washing your brushes after every use is ideal.
The Ultimate Guide to Cleaning Brush Hairs
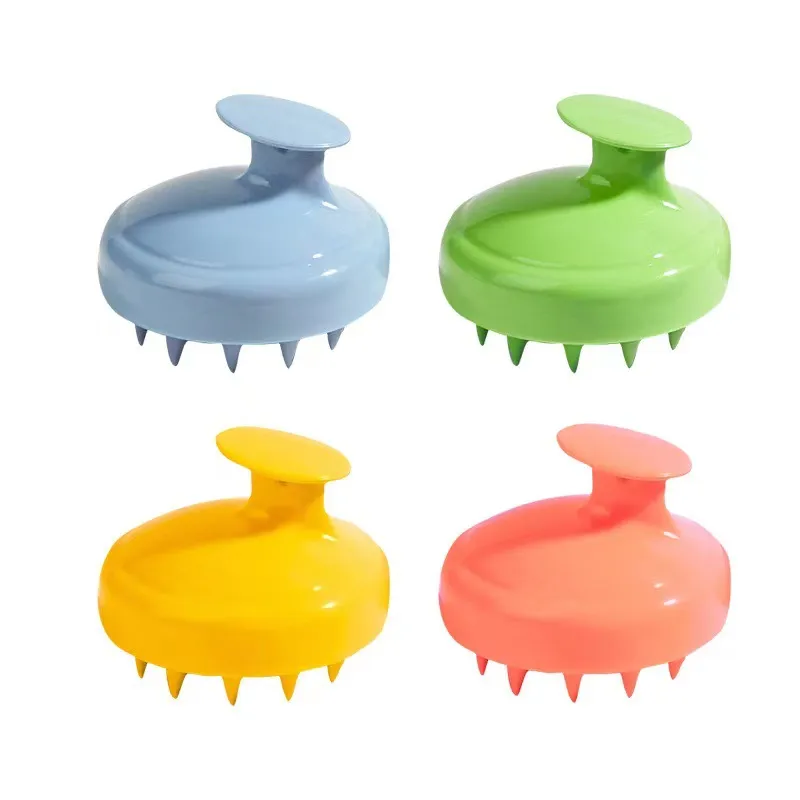
Buy Now
See More: Wholesale Products
Cleaning your brush hairs doesn’t have to be a daunting task. With the right tools and techniques, you can keep your brushes clean and hygienic. Here’s the ultimate guide to cleaning your brush hairs:See More: DIY Acrylic Wall Art: Simple Tips and Techniques for Creating Your Own Masterpiece
Step 1: Gather Your Tools
Before you start cleaning your brushes, you need to gather all the necessary tools. You will need:
- A brush cleaner or gentle shampoo
- A bowl or container
- A clean towel or paper towelSee More: How to Choose the Best Paper Towel Holder for Your Kitchen
- A silicone brush cleaning pad (optional)
Step 2: Wet Your Brushes
Start by rinsing your brushes under warm water to remove any excess makeup. Make sure the water is not too hot, as it can damage the bristles. Hold the brush with the bristles facing downwards to prevent water from getting into the ferrule (the metal part that holds the bristles) and loosening the glue that holds the bristles together.
Step 3: Apply Brush Cleaner
Add a few drops of brush cleaner or gentle shampoo to the bowl or container. Swirl the brush gently in the mixture, making sure to coat all the bristles. If you’re using a silicone brush cleaning pad, you can apply the cleaner directly onto the pad and swirl the brush on it.
Step 4: Rinse the Brushes
Rinse the brushes under running water until the water runs clear. Make sure to rinse thoroughly to remove all the soap residue.
Step 5: Dry the Brushes
Gently squeeze out any excess water from the bristles and reshape them with your fingers. Lay the brushes flat on a clean towel or paper towel and let them air dry overnight. Do not stand the brushes upright to dry, as this can cause water to seep into the ferrule and loosen the glue.
Tips for Keeping Your Brushes Clean
- Store your brushes in a clean and dry place to prevent bacteria buildup.
- Avoid sharing your brushes with others to minimize the risk of transferring bacteria.
- Use a deep-cleaning brush shampoo at least once a month to remove stubborn buildup.
- Use a brush guard to protect the bristles from getting bent or damaged during storage or travel.
Conclusion
2. Proper cleaning technique
Here are some tips to help you clean your brush hairs effectively:
1. Gather your tools
Before you start cleaning your brushes, you'll need a few things: a bowl or sink, mild soap or shampoo, and a towel. You can use a specialized brush cleaner, but dish soap or baby shampoo work just as well. Make sure the soap is gentle and doesn't contain any harsh chemicals that could damage the bristles. Also, avoid using hot water as it can loosen the glue that holds the bristles together.
2. Wet the bristles
Hold your brush under running water with the bristles pointing down. Be careful not to get water on the ferrule (the metal part that connects the bristles to the handle), as this can cause rust or loosen the glue. Gently swirl the brush in the water to remove any surface dirt and makeup residue.
3. Add soap/shampoo
Squeeze a small amount of soap or shampoo into the palm of your hand or the bowl/sink. Swirl the brush gently in the soap until it lathers up and the bristles are fully coated. You can also use a silicone brush cleaning pad to help work the soap into the bristles and remove stubborn buildup.
4. Rinse thoroughly
Rinse the brush under running water again, making sure to wash away all the soap and suds. Repeat this process until the water runs clear and there's no more makeup residue left on the bristles.
5. Squeeze out excess water
Gently squeeze the bristles to remove any excess water. Be careful not to tug or pull on the bristles, as this can damage them or misshape them. If the bristles are densely packed, you may need to press them against a towel to absorb the water.
6. Reshape and air dry
Once the bristles are mostly dry, reshape them with your fingers to their original shape. Lay the brush flat on a towel or hang it upside down so that the bristles are facing downwards. This will allow the water to drain away from the ferrule and prevent any moisture from seeping into the handle. Avoid using a hair dryer or heat source to speed up the drying process, as this can damage the bristles and cause them to frizz or curl.See More: how to choose the best mini hair dryer for traveling
Conclusion
3. Drying and storing
Cleaning your brushes regularly is essential, but another equally important aspect of maintaining your brushes' quality is proper drying and storing. Drying and storing your brushes correctly ensures their longevity and keeps them in good working condition for longer.
In this article, we will discuss the importance of drying and storing your brushes correctly and how to do it effectively.
Why Is Proper Brush Drying And Storing Important?
Drying and storing your brushes correctly is important because it helps maintain the shape, quality, and performance of your brushes. If you don't dry your brushes properly, the excess water can loosen the glue holding the bristles together, causing them to shed or fall out.
Additionally, if you store your brushes incorrectly, they can become misshapen, which can affect the application of your makeup products. To avoid this, it's crucial to dry and store your brushes correctly.
Steps To Properly Dry Your Brushes
Step 1: Squeeze Out Excess Water
After washing your brushes, gently squeeze out any excess water using a clean towel or paper towel. Avoid wringing or twisting the bristles as this can damage them.
Step 2: Reshape The Brush Hairs
Reshape the brush hairs while they're still damp to maintain their original shape. If the brush hairs are misshapen, they won't apply your makeup products as effectively, and it could also lead to damages over time.
You can reshape your brushes using your fingers or a special brush guard. Place the brush guard over the bristles and gently mold the bristles into the desired shape.
Step 3: Let Them Air Dry
Once you've reshaped the brush hairs, leave them to air-dry completely. Avoid drying your brushes in direct sunlight or near a heat source as this can damage the bristles.
Instead, place your brushes on a clean towel and let them dry naturally. Ideally, lay them flat or at an angle with the brush head slightly elevated to prevent moisture buildup in the ferrule.
Steps To Properly Store Your Brushes
Step 1: Keep Them Clean
Before storing your brushes, ensure that they're clean and dry. Dirty brushes attract dust and other particles, which can accumulate over time and affect the quality of your makeup application.
Step 2: Use A Brush Holder or Case
Using a brush holder or case will protect your brushes from dust, dirt, and other elements that can damage them. It also makes it easier to find the brush you need when applying your makeup.
Brush holders come in different shapes and sizes, so choose one that suits your needs. If you have a large brush collection, consider getting a bigger holder or case to accommodate all your brushes.See More: DIY Candle Holders Set: How to Make Beautiful Candle Displays at Home
Step 3: Store Them Upright
Store your brushes upright to prevent the bristles from becoming misshapen. You can use a brush holder with individual slots for each brush, or you can place them in a cup or jar.
If you're using a cup or jar, fill it with beads or rice to keep your brushes standing upright. This will prevent them from rubbing against each other and damaging the bristles.
Step 4: Keep Them Away From Moisture
Avoid storing your brushes in humid areas like the bathroom as this can cause moisture buildup in the bristles and damage them. Instead, store them in a cool, dry place like a dressing table or vanity.
Conclusion
Properly drying and storing your brushes is essential for maintaining their quality, shape, and performance. By following the steps outlined above, you can ensure that your brushes remain in excellent condition and provide you with flawless makeup application every time.
4. Benefits of regular cleaning
Benefit #1: Maintaining Brush Quality
Makeup brushes can be a significant investment, so it is essential to maintain their quality for longevity. Regular cleaning prevents the build-up of product residue, which can make the bristles stiff and rough. This can lead to difficulties in blending and applying makeup smoothly.
Cleaning your brushes regularly ensures that they remain soft and flexible, making them easier to use for precise application. Additionally, regular cleaning helps to prevent shedding or damage to the bristles during application.
Benefit #2: Preventing Skin Irritation and Breakouts
Dirty brushes can harbor bacteria and fungi, leading to skin irritation, breakouts, and infections. These impurities can also cause allergies or exacerbate existing skin conditions such as eczema and rosacea.
Cleaning your brushes regularly eliminates the accumulation of bacteria, dirt, and oil on the bristles. This, in turn, reduces the risk of developing skin problems or transfer of bacteria from the brushes to your skin.
Benefit #3: Ensuring Accurate Color Application
Using brushes that have not been thoroughly cleaned can lead to inaccurate color application. The buildup of product residue on the bristles can mix with the new color you use, creating a completely different shade than intended.
Cleaning your brushes will ensure that the colors you apply stay true to its original hue, allowing for accurate color application. This is especially crucial when working with pigmented eyeshadows and heavily-pigmented lipsticks.
Benefit #4: Saving Money
Dirty brushes can compromise the effectiveness of makeup products, causing you to use more product than necessary. When using clean brushes, you require less product to achieve the desired result, which saves you money in the long run.
Additionally, dirty brushes can damage your makeup products. Bacteria and oils from the brushes can contaminate your products, causing them to spoil or expire faster. Regular cleaning of your brushes will extend the shelf life of your makeup products, saving you money on replacements.
How to Clean Brush Hairs
Now that we've established the importance of regular cleaning let's dive into the ultimate guide on how to clean brush hairs.
Step 1: Wetting the Brushes
Start by running the bristles of your brushes under warm water, ensuring that only the bristle area is wetted. Be careful not to soak the entire brush in water as this can loosen the glue holding the bristles together.
Make sure that the water temperature is not too hot or cold, as this can damage the bristles.
Step 2: Applying Cleanser
Next, apply a small amount of brush cleanser or mild soap onto the bristles. You can do this by placing some cleanser onto your palm and swirling the brush gently in the soap.
Alternatively, you can apply a cleansing solution onto a clean towel or brush pad and swirl the brush in the solution.
Step 3: Lathering and Rinsing
Use your fingers to lather the cleanser onto the bristles, ensuring that all the product residue, dirt, and bacteria are removed. Rinse the brush under running water until the water runs clear. Repeat this process until the water remains clear, indicating that the brushes are free from all cleansers and dirt residue.
Step 4: Drying the Brushes
Gently squeeze out any excess water from the brush, reshape the bristles and lay flat on a clean towel. Do not stand the brushes upright as this can cause water to seep into the handle and damage the brush.
Ensure that the brushes are placed in a well-ventilated area to dry completely before storing them away.
Conclusion
5. Tools for effective cleaning
Cleaning your brush hairs may seem like a daunting task, but with the right tools and techniques, it can be quick and easy. In this ultimate guide, we'll take you through the process of cleaning your brush hairs and share some tips and tricks for maintaining your brushes.
Tools for Effective Cleaning
1. Brush Cleanser
The first tool you need to effectively clean your brush hairs is a good brush cleanser. There are many different types of brush cleansers available in the market, such as liquid cleansers, solid cleansers, and sprays. When choosing a brush cleanser, look for one that is gentle and formulated specifically for makeup brushes. You can also make your own DIY brush cleanser using ingredients like dish soap, olive oil, and vinegar.
2. Bowl or Container
You will also need a bowl or container large enough to hold your brushes while they soak in the cleanser. A plastic or glass bowl works well for this purpose. Make sure the bowl is deep enough to fully submerge your brushes.
3. Towel
Next, you will need a towel to dry your brushes after washing them. Use a clean towel that is absorbent and soft. Avoid using paper towels or rough towels as they can damage the brush hairs.See More: 5 Surprising Ways to Repurpose Used Paper Towels in Your Daily Life
4. Brush Egg or Mat
A brush egg or mat is a handy tool that helps to deep clean your brushes. These tools have different textures that help to remove dirt and debris from the bristles of your brushes. They are also easy to use and can prolong the life of your brushes.
5. Drying Rack
Lastly, you will need a drying rack to dry your brushes after washing them. A drying rack allows your brushes to dry properly without damaging the brush hairs or handles. You can use a specialized brush drying rack or make your own by placing your brushes on a flat surface with the brush heads hanging off the edge.
Steps for Cleaning Your Brush Hairs
Now that you have all the necessary tools, let's dive into the steps for cleaning your brush hairs.
Step 1: Rinse Your Brushes
Start by rinsing your brushes under lukewarm water. Hold the brush head facing down towards the sink and let the water flow over the bristles. This will help to remove any excess makeup and loosen any dirt or debris.
Step 2: Cleanse Your Brushes
Once your brushes are wet, apply a small amount of brush cleanser onto the bristles. Gently massage the cleanser into the brush hairs with your fingers or a brush egg/mat. Make sure to work the cleanser into the bristles thoroughly to ensure that all dirt and residue are removed.
Step 3: Rinse Your Brushes Again
After cleansing your brushes, rinse them under running water again, gently massaging the bristles until all the cleanser is removed. Repeat this step until the water runs clear, indicating that all dirt and residue have been removed.
Step 4: Dry Your Brushes
Once your brushes are clean, gently squeeze out any excess water and reshape the brush hairs. Lay them flat on a towel to dry or place them on a drying rack. Avoid drying your brushes upright as water can seep into the ferrule (the metal part that connects the brush hairs to the handle) and loosen the glue.
Tips for Maintaining Your Brushes
In addition to cleaning your brushes regularly, there are other things you can do to maintain the quality and longevity of your brushes.
- Store your brushes in a dry, cool place away from direct sunlight.
- Avoid getting liquid or cream products on the handles of your brushes, as this can cause them to loosen or become damaged.
- Use a brush guard or sleeve to protect your brushes while traveling or storing them.
- Don't share your brushes with others to avoid cross-contamination.
Conclusion
Cleaning your brush hairs is an essential part of maintaining healthy skin and achieving a flawless makeup application. By following these steps and using the right tools, you can keep your brushes clean and in excellent condition for years to come. Remember to clean your brushes at least once a week and invest in high-quality brushes that will last longer and perform better.
Recommended related content
How to Clean Silver Charms: The Ultimate Guide for Sparkling Jewelry
How to Style Lantern Sleeve Dresses: The Ultimate Guide for Fashion Lovers
Hats Case: The Ultimate Storage Solution for Your Hat Collection
What to Wear with White Loafers: The Ultimate Guide for Fashionable Outfits
